Dill/rosemary/lemon mahi mahi and farm fresh carrots with a sugar glaze!

Hey Guys!

I am back blogging after a brief break. The boyfriend and I took a mini vacation up north to attend my cousin’s wedding and celebrate our anniversary. We had a great time and ate WELL! (Read: 4 star restaurants, Italian, Sierra Nevada Brewery, wine tasting, cheese and cheese and cheese!)

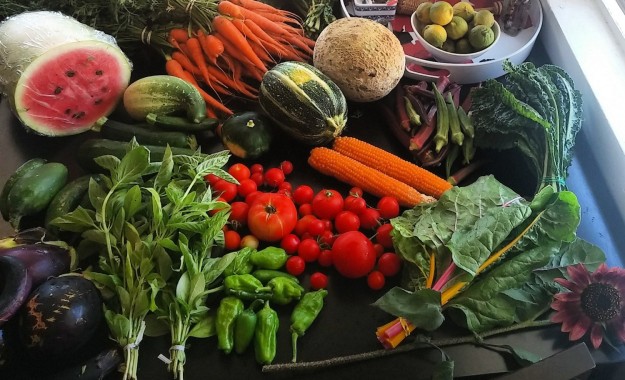
So it took a bit to get back in the saddle and cooking again. Was for sure made easier by the arrival of this week’s CSA. This week we were gifted with passion fruits … #yumyumyum (can you hashtag blogs? oh well, I just did.) Stay tuned for some awesome cocktail recipes!

But first, this Sunday’s dinner. As I’ve mentioned in previous posts I’ve been trying to cook more fish. So far that’s been limited to tilapia and Salmon. So this week while browsing through Trader Joe’s I decided to be adventurous and buy some Mahi Mahi! (“I’m not that hungry, I’ll just have 1 Mahi.”) … Per usual our lemon tree is producing like crazy so I was searching good lemon based recipes. Our CSA arrived Sunday morning and contained fresh rosemary that smelled AMAZING. So I decided, I am going to create my own rub. Viola! an idea was born. I hope you like it!

WHAT YOU'LL NEED

WHAT YOU’LL NEED

INGREDIENTS – salt, pepper, lemon, garlic, dill.

(Not pictured water, olive oil, bread crumbs.)

Step One-

In a bowl mix dill, diced garlic, rosemary, salt, pepper, bread crumbs and lemon zest.

MIXED

Step Two – Add Olive oil and whisk together until you have a paste. Add water as needed to thin out paste to make it less “lumpy”. If you add too much water, just add more of the various ingredients listed above.

Step Three: Juice your lemon and add juice to mixture. Stir well.

FINAL MIX

Step Four: With a basting brush coat the fish well on both sides. Use up all the mixture. Place fish in fridge to marinate for at least 1 hour.

FISH

At this point you should start preparing the carrots as they too need to marinate in the fridge before cooking.

WHAT YOU'LL NEED.

WHAT YOU’LL NEED.

INGREDIENTS: Carrots, brown sugar, white sugar, cinnamon, mandarin olive oil.

(If you don’t have flavored olive oil, because really who keeps this around? -mine was a gift- just add some juice of your preferred citrus fruit. I think orange, grapefruit, anything really will be nice.)

Step One – Cut carrots and discard greens, tops and ends.

(Please compost! If you are not set up for composting you should look into it. Also, save the greens and use them chopped up in your salads to add a nice spice.)

cut carrots

Step Two: in a bowl mix both the sugars, cinnamon and olive oil. Mix together to make a sauce. Add water as needed to thin out the sauce.

sauce

Step Three: Add carrots and mix until coated thoroughly. Put in fridge to marinate for at least 1 hour.

carrots in sauce

Step Four: TAKE A BREAK! You’ve got an hour to kill, grab a drink, relax, watch some football.

Featured Cocktail!

Gin, Triple Sec, Midori, Lemon Juice (fresh squeezed of course), cantaloupe (from our CSA), ball-o-ice, and garnish!

cocktail

Step Five: Now that you’ve enjoyed your drink it’s time to get cooking again. The carrots take longer than the fish so start them first.

Place carrots and all sauce into oven safe baking dish. Bake in oven on middle rack at 375 degrees for 20 minutes.

carots baking dish

Step Six: Five minutes before the carrots should be done it’s time to prep the fish. I decided to cook this fish on the Foreman Grille. I love this. It’s a. easy b. it’s healthy c. less clean up (well I make the BF do the dishes so this doesn’t really matter to me!)

Heat the grill and spray with olive oil to prevent sticking. Place fish onto grill and lay lemon slices and remainder of rosemary onto fish. Close lid and grill until light goes off. Check periodically to ensure the fish is not burning. If the fish is not grilling evenly, place pressure (with oven mitt on!) onto part of the grill where extra grilling is needed.

fish on grill

Step Seven: Remove carrots from oven. Do not allow the carrots to cool. Using a slotted spoon to allow the excess sauce to drain, transfer into heat safe bowl. Sprinkle with brown sugar, serve warm.

final carrots

Step Eight – Remove fish from grill with spatula, add the lemons and rosemary from the grill to garnish.

final fish

And EAT IT UP! I served mine with a slice of watermelon from our CSA and a glass of Torontes wine.

meal

(Sorry the picture is a little dark, we ate it in the backyard!)

Final Tally – # of Farm Fresh Ingredients – 5

Final Tally – # of Store Bought Ingredients – 6 ( 4 of which are spices.)

Hope  you like it!

Low Harm Eggplant Parm!

So our summer season CSA just finished up! Hard to believe as we are still battling temps in the upper 90s! This has been such an unseasonably warm September for San Diego (and all of California.) As you guys have probably read/heard we are in a severe drought. Well the warmer temperatures have blessed us with foods much later into the year than usual. This week our CSA gifted us lots of eggplant! Eggplants prefer warmer temperatures and so our hot hot summer has produced lots of eggplant, squash, okra, tomatoes etc. LUCKY US! (Fall CSA is underway this week so stay tuned for new and exciting CSA items, and, HOPEFULLY, some cooler weather.) As always, if you’d like to join the CSA we belong to, check out their website at http://www.urbanlifefarms.org (San Diego Residents Only.)

Side Note: In researching eggplant a little bit I discovered that their flowers are BEAUTIFULLY BADASS.

eggplant flower

(photo from Wikipedia. click to enlarge any photo.)

So, what to do with all this eggplant. First problem- my boyfriend hates eggplant. Second problem – I was getting really tired of salads at work. I have been really focused on eating better which has resulted in months of salad only lunches. Most of the time it’s fine, as I branch out a lot in the kitchen for dinners. But lately I’ve been struggling! Those Cheetos and Adobado burritos were calling my name! So I decided to be proactive and cook a “bomb” meal at home that I could take for lunch. And thus, the idea of eggplant parmesan was born. I LOVE eggplant parm, but let’s be honest, a big part of what I love is the gooey gooey cheese and the amazing crunchy eggplant smothered in that lovely lovely sauce. (Remember, I warned you I loved Italian food.) But I’ll admit, it’s not the healthiest. So I wanted to create a meal that would satisfy my cravings, change things up a bit, but not ruin my diet. So here is my best attempt at low harm eggplant parm. Of course, yes, it still has cheese, and the eggplant are still breaded and dipped in eggs, but I reduced the recipes I found online by 1/2 their damage potential. I hope you enjoy!

First Up! What You’ll Need:

what youll need

Pictured: eggplant, tomatoes, basil, salt, pepper, breadcrumbs, parmesan cheese.

(We get fresh basil from our CSA almost every week and we also grow it in our backyard. I just hang a “branch” of it in the kitchen for 2 weeks, remove leaves, store in a sealed container, and break up into pieces when needed for cooking.)

Not Pictured: gorgonzola cheese, store bought sauce (or make your own), 1 raw egg.

(In an upcoming post I will give a few recipe ideas for homemade pasta sauce!- stay tuned.)

Step One- Preheat oven to 375 degrees. Slice Eggplant. It doesn’t have to be super thin, in fact too thin may wilt in the oven, but eggplant skin can be thick so if the slices are too thick as well, eating may require more effort 🙂

In bowl, mix bread crumbs, salt, pepper, dried basil, parmesan cheese.

In separate bowl beat the egg. Add water – not too much. (I added water vs. using a second egg like the recipe called for. This will reduce the harm factor of the recipe without really changing the taste of the meal.)

Step Two- Dip each slice of eggplant into the egg, letting excess moisture drip off back into the bowl. Then dip slice into breadcrumb mixture until mostly covered. Set aside on baking dish. Repeat with all slices until done. Lay out slices on baking dish so that none are touching.

egg tray

Step Three- Bake in oven, at 375, on the middle rack for 20 minutes. Then flip all slices and bake an additional 20 minutes. Slices should be browned and crispy. Check periodically to not over cook.

Step Four- While the eggplant is baking: cut tomatoes into medium sized chunks, do not slice. Set aside. Oil your baking dish.

Step Five- When the eggplant is done, get all your ingredients together for a food assembly line! In this order make layers until all ingredients are done. Sauce, eggplant, tomatoes, both cheeses, breadcrumbs. Repeat. Final layer should be cheese.

layers

Step Six – bake in oven, again on middle rack and again at 375 degrees for an additional 20 minutes or until all cheese is melted and sauce is slightly bubbling. Do not over cook because a. the cheese will burn and b. the sauce will become watery. When done, remove from heat and allow to cool before serving.

final

And VIOLA!

I’ll admit it, I couldn’t wait ’till the next day’s lunch so I sneaked a taster that night. It was great both days!

Final Tally-

Farm Fresh Ingredients – 4

Store Bought ingredients 4

——–

How do you guys cook eggplant?

Leave a comment!

Happy Eating!